Hello, in this article we will see how to create a Storage Account and assign the File Share as a network unit with two options, the first through a PowerShell script and the second using the graphic interface of the file browser in Windows.
Prerequisites:
- Windows with the port 445 enabled.
- A Microsoft Azure subscription.
Disclaimer: Due to the constant updating of Cloud Computing technologies some steps may be different at the time of reading the article, I will make an effort to keep it updated, but there could be some differences between what is shown below and the Azure console. moment of implementation.
Creating a Storage Account and an Azure File Share
- Login to the Azure Portal in https://portal.azure.com/ ,click on All Services > Storage accounts.
- Click on Add at the top of the window
- For the creation of resources I will use a convention of the initials of the type of resource followed by the initial of the name, last name and in case you need to create two equal resources we will put the number 02, for my case the initial of my name and my last name is vvillar. For the tutorial I am assigning the following values:
- Subscription: Select your subscription
- Resource group: Create new > rg-vvillar
- Storage account name: savvillar (it has to be a unique name, in lowercase and without special characters)
- Location: East US (Review https://azurespeedtest.azurewebsites.net/)
- Performance: Standard (Review https://docs.microsoft.com/en-us/azure/storage/common/storage-introduction#introducing-the-azure-storage-services)
- Account kind: StorageV2 (general purpose v2)
- Replication: Locally-redundant storage (LRS)
- Access tier (default): Hot
- Click on Next:Advanced> In the new window fill the following values:
- Security: Enabled (Review https://docs.microsoft.com/en-us/azure/storage/common/storage-require-secure-transfer)
- Allow access from: All networks (Review https://docs.microsoft.com/en-us/azure/storage/common/storage-network-security)
- Blob soft delete: Disabled (Review https://docs.microsoft.com/en-us/azure/storage/blobs/storage-blob-soft-delete)
- Hierarchical namespace: Disabled
- Click on Next:Tags> Asignar un nombre y tag para identificar fácilmente el recurso (este paso es opcional).
- Name: Tutorial
- Value: Storage
- Click on Next: Review + create > Verify that the Validation Passed phrase appears at the top of the window and click Create
- Go to the created resource by clicking on Go to resource.
- In the list of options click on Files and in the upper part of the window click on +File Share.
- Give File Share a name (it does not accept capital letters) and we assign a quota (it is optional and the limit is 5120GB)
- Name: fileshare-vvillar
- Quota: 1024
- Click on Create


Attaching the Azure File Share as a network unit
Option 01
- We are going to enter to the File Share created and then connect it as a network unit to a server that uses Windows Server, to do so click on Connect at the top of the window, select a label for the network unit and copy the second block of commands (in the other tabs you have options for Linux and MacOS).
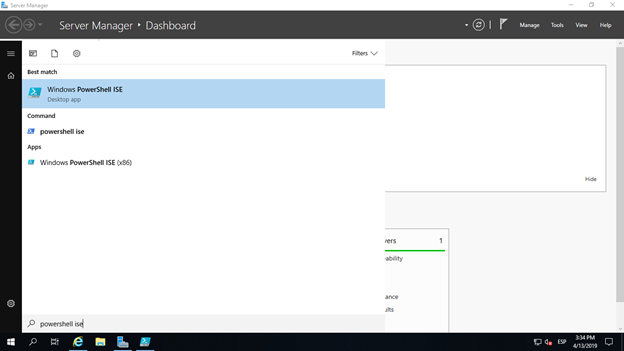
- Go to a server with Windows Server OS(it is also possible to do it with a Windows client OS using the same steps) open the PowerShell ISE program, paste the code that you copied and click Run Script.
- Go to the file browser and see that the Azure File Share is attached as a network drive.


Option 02
- Inside the server with Windows Server OS (or Windows client OS) open the file browser, click on the Computer tab and then click on Map network drive
- A pop-up window will appear, fill the following values:
- Drive: V:
- Folder: \\savvillar.file.core.windows.net\fileshare-vvillar
- Check in Reconnect at sign-in
- Check in Connect using diferent credentials
- Click on Finish
- In the Azure console go to the Access keys option and copy the key1 value
- Paste the value in the Password field of the pop-up window and click on OK
- See that you have the file share attached as a network unit


I enjoy reading through an article that can make people think.
Also, thank you for allowing for me to comment!
Thank you Tahlia for taking some time to read the blog! Please stay connected with the new content.