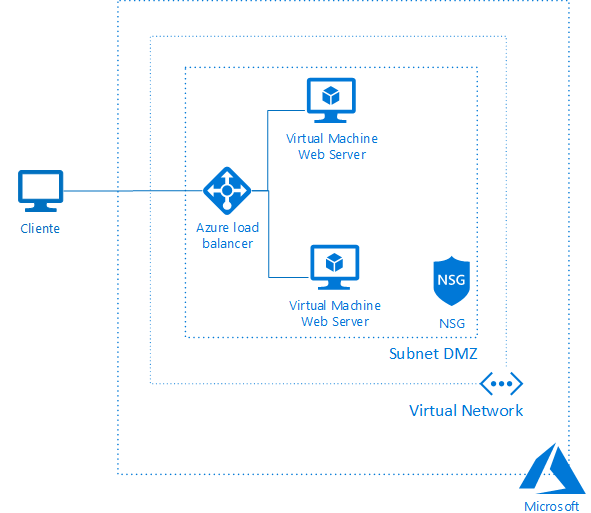
Hello, in this series of articles we will see how to include two virtual machines in load balancing, one we will supply using the Azure portal, another using a JSON template, we will configure the public load balancer and we will expose the web service through the port 80.
Prerequisites:
- Visual Studio 2017 with de Azure module instaled.
- A Microsoft Azure subscription.
- Powershell with the Azure module (https://azure.microsoft.com/es-es/downloads)
The architecture would be similar to this:
Disclaimer: Given the constant updating of Cloud Computing technologies some steps may be different at the time of reading the article, I will make the effort to keep it updated, but there could be some differences between what is shown below and the Azure console at the moment of the implementation.
Creating the first virtual machine using the Azure portal
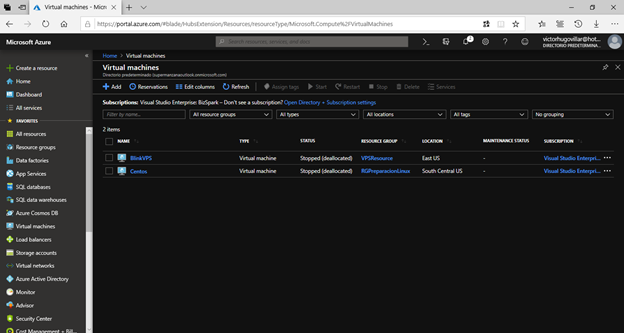
- Enter the MS Azure portal at https://portal.azure.com/, once inside enter All Services>Virtual Machines.
- Click on Add
- For the creation of resources I will use a convention of the initials of the type of resource followed by the initial of the name, surname and in case you need to create two equal resources we will put the number 02, for my case the initial of my name and my last name would be vvillar. So let’s go with the following configuration:
- Suscripción: Select your subscription
Resource group: Create new > rg-vvillar
Virtual machine name: vm-vvillar
Region: East US (Review https://azurespeedtest.azurewebsites.net/)
Availability options: Availability set (Review https://docs.microsoft.com/en-us/azure/virtual-machines/windows/regions-and-availability#availability-sets) - Availability set: Create new
- Name: as-vvillar
- Fault domain: 2
- Update domains: 2
- Click en OK
- Image: Windows server 2019 Datacenter
- Size: DS1 v2
- Username: vvillar
- Password: A password of 12 characters containing a capital letter, number or special characters
- Confirm Password: The same password as in the previous step
- Public inbound ports: None
- Already have a Windows License: No
- Suscripción: Select your subscription
- Click on Next: Disks>
- OS Disk Type: Premium SSD (Review https://docs.microsoft.com/en-us/azure/virtual-machines/windows/disks-types)
- Data Disk: We are not going to add any data disk
- Click on Next: Networking>
- Virtual Network: Create new (Reviewhttps://docs.microsoft.com/en-us/azure/virtual-network/virtual-networks-overview)
- Name: vnet-vvillar
- Address range: 10.1.0.0/16
- Subnet Name: Snet-DMZ-Prod
- Address range: 10.1.0.0/24
- Public IP: Create new
- Name: pip-vvillar
- SKU: Standard
- Assigment: Static
- NIC network security group: None
- Public inbound ports: None
- Accelerated Networking: Off
- Load Balancing: No


- Virtual Network: Create new (Reviewhttps://docs.microsoft.com/en-us/azure/virtual-network/virtual-networks-overview)
- Click on Next: Management>
- Enable plan basic for free: Yes (Review https://docs.microsoft.com/en-us/azure/security-center/security-center-intro)
- Boot diagnostic: On
- OS Guest Diagnostics: On
- Diagnostics storage account: Create new
- Name: savvillardiag (it has to be a unique name in lowercase)
Account kind: Storage v2 (Review https://docs.microsoft.com/en-us/azure/storage/common/storage-account-upgrade) - Performance: Standard
- Replication: Locally-redundant storage(LRS) (Review https://docs.microsoft.com/en-us/azure/storage/common/storage-redundancy)
- Click on OK
- Name: savvillardiag (it has to be a unique name in lowercase)
- System Assigned managed identity: Off
- Enable Autoshut-down: Off


- Click on Next: Advanced > In this Blade (window) if we want to add some extension of Microsoft or third parties we can do it, for this exercise we will not add any extension.
- Click on Nextt: Tags >
- Name: IaaS
- Value: Virtual Machine 01
- Click on Next: Review + Create >
Wait until the phrase Validation Passed appears, click on Download template for automation to create our second virtual machine. - Click on Download, save the zip file locally.
- Close the window to return to the previous one and click on Create
- Wait for the resources to finish creating and in the top left part click on Go to resource in the Notifications section (symbol of a bell)