Hello, in this article we will see how to automate the deployment of a web application using Azure Devops, Git and App Service of MS Azure.
Prerequisites:- A Microsoft Azure subscription.
- An Azure DevOps user (free up to 5 users)
- Git (https://git-scm.com/downloads)
- Visual Studio Code (https://code.visualstudio.com/download)
Disclaimer: Given the constant updating of Cloud Computing technologies some steps may be different at the time of reading the article, I will make the effort to keep it updated, but there could be some differences between what is shown below and the Azure console at the moment of the implementation.
Creation of the website
Let’s start by creating the application:
- Enter Visual Studio Code, we will create an html file with a basic structure and we will name it index.html.

<!DOCTYPE html>
<html lang="en">
<head>
    <!--Created by Victor Villar-->
    <meta charset="UTF-8">
    <meta name="viewport" content="width=device-width, initial-scale=1.0">
    <meta http-equiv="X-UA-Compatible" content="ie=edge">
    <title>Victor Villar Demo</title>
</head>
<body>
    <h1>Hello from Visual Studio Code </h1>
    <h2>Learning about Azure DevOps</h2>
</body>
</html>
Creating the Azure DevOps repository
- Go to the Azure DevOps portal (https://azure.microsoft.com/en-us/services/devops/) If you are not registered, register (use the same email with which you have access to Azure) or enter your credentials.
- In the upper right part of the window click on Create Project, in the advanced option make sure that the Git option is selected. Click on Create.
- In the tabs on the left go to the Repos option
- We will do a push of our html file using the commands that appear on the screen. Prior to this we have to open the Git Bash program and go to the folder where the html file is located and type the following commands git init
- If we go back to Azure DevOps and do a refresh on the page Repos >Files we will see the code that we just upload.
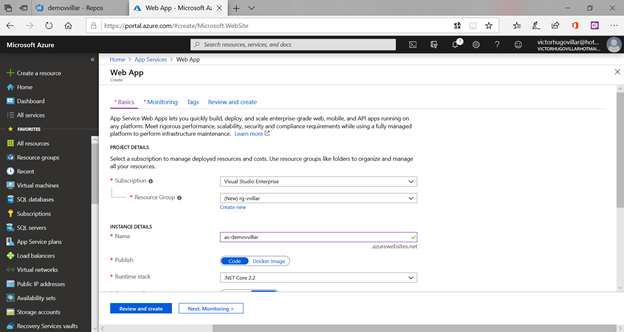
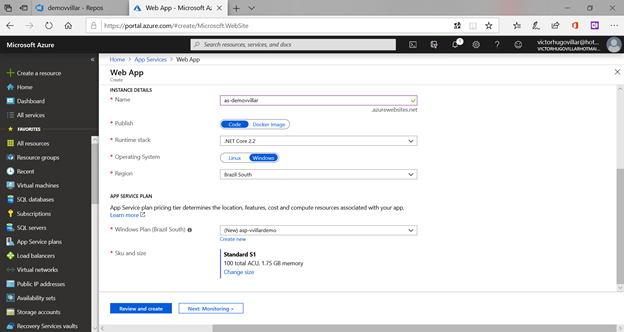
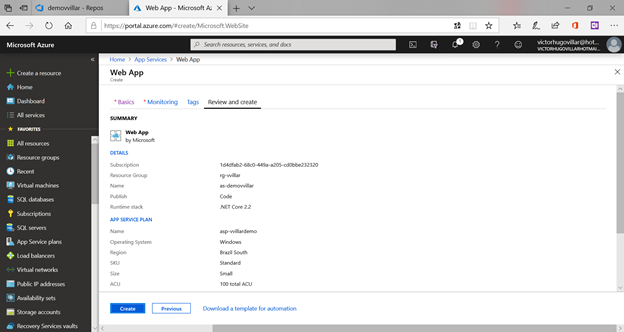
- Now that we have our repository ready, we will go to Azure and create an App Service to host our website by entering portal.azure.com. Click on All Services and then on App Services.
- Click on Add in the upper part of the window and then fill in the following values
- Subscription: <Your subscription>
- Resource group: Create new > rg-vvillar
- Name: as-demovvillar
- Publish: Code
- Runtime Stack: .NET Core 2.2
- Operating system: Windows
- Region: Brazil South
- Windows Plan: Create new > asp-vvillardemo
- Sku and size: Standard S1


git add .
git commit -m “first commit”
git remote add origin https://victorhugovillar@dev.azure.com/victorhugovillar/demovvillar/_git/demovvillar
git push -u origin –all


Creation of the Azure DevOps pipeline
- Go back to Azure Devops and go to the tab on the left called Pipelines > Builds and click on New Pipeline
- Select Azure Repos Git
- Select the repository that we created
- As the demo application only consists of an HTML file select HTML, if we had another type of project we will choose here the type of project in which we will perform the build.
- A window appears with the YAML file of the configurations that we made in the previous steps. Click on Save and run.
- Leave the selected value: Commit directly to the master Branch and click on Save and run.
- Wait for the build job to compile the application and all the steps appear with a green check.
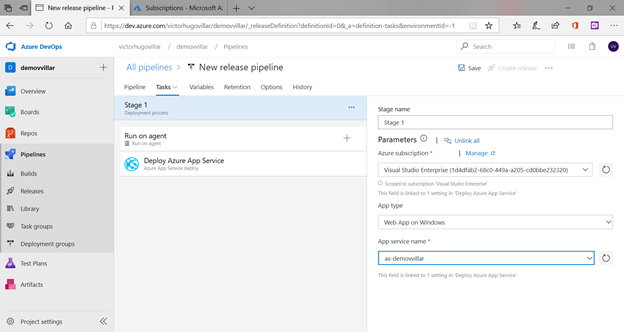
- Now we are going to generate the pipeline for the release, for it go to Pipelines > Releases and click on New Pipeline
- In the popup window on the left, select Azure App Service Deployment
- Close the pop-up window and click on + Add an Artifact, select Build, choose our Build and click on Add
- Click on the upper part where the lightning bolt appears and in the first option, leave it as Enabled and close the window.
- Click on the Stage 1 box on the link “1 job, 1 task”, in the first box select your subscription, click on Authorize (in case you require authentication add your Azure credentials) and in the third box select your App Service, in the top right click on Save and click on OK
- To trigger the process go to the code, add a line in the body <h3>CD from Azure DevOps</h3>
- Return to Git Bash and execute the commands git pull
- If we go back to Visual Studio Code and make a new commit, a process will be triggered so that a release is created
- Return to Azure and in the App Service at the top click on Browse, we will see the website with the new changes


Save the changes

:wq
git add .
git commit -m “new commit”
git push -u origin -all


